

I have tracked a lot of deer in my lifetime. Many of them I shot myself and some were shot by friends. I learn a lot from these tracking experiences which has helped me become very good at it. My friends usually call me for help anytime they shoot a deer because I tend to have an eye for finding them. So, what do I look for when tracking a shot deer?
A shot deer will typically leave behind a blood trail that can be followed. If there isn’t a good amount of blood on the trail, or no blood, try looking for other clues such as tracks, hair, and guts. Following the 11 steps in this article will help you become very good at tracking and finding deer that were shot.
In ideal situations, we want to shoot deer and watch them fall over and die within sight. In this scenario, there is no need to track since we already know where the deer is at. The next best scenario is to shoot a deer that leaves behind a very heavy blood trail that is easy to follow and will lead us all the way to the dead deer.
In the real world, these ideal situations don’t always happen. Tracking can be very difficult even if you shot a deer where you were aiming. I have seen several times when a deer was shot in the vital organs and didn’t leave a blood trail that could be followed. Tracking can have its challenges which is why I created step-by-step guide for you to follow and share with friends.
Try to follow these 11 steps anytime you shoot a deer. If you can’t find your deer after following these 11 steps, you will have to resort to alternative methods to find your deer. Make sure to read to the end so that you know how to exhaust every option before deciding to stop looking for your deer.

Step 1. What part of the body did you hit?
When you shoot a deer, pay close attention to where your shot hit the body. This is easier for a bowhunter to see since our shots are within close range, arrows are slower than bullets, and we don’t have to deal with the kickback of a gun. Even if you shot a deer with a gun, you might still be able to see where the deer was hit as it runs away. Sometimes they will even stop running to look back in your direction to see what happened, providing an opportunity to see where the deer was shot.
Having an idea on the quality of the shot will help you make a good decision when you decide to start tracking the deer (Step 9).
Step 2. How did the deer respond to the hit?
Buck fever can cause hunters to space out to the point of not recognizing where we hit the deer or if we even hit them at all. So, how do you tell if a deer is hit?
Deer respond to being shot in various ways. Deer commonly “mule kick” as soon as an arrow or bullet hits the body. This is when both back legs kick backwards. Deer also respond to being shot by running hard and fast with their tails tucked under the butt.
You might witness a deer twitching its tail excessively or even see it losing its balance because of all the blood it’s losing. Both of these are excellent signs that the deer is about to die very soon.
One time I shot a buck that growled as soon as my arrow hit him, but he didn’t mule kick or run away hard and fast. He just galloped about thirty yards away, looked back at me, and then just walked off like nothing happened.
Step 3. Did you see blood when you shot?
Were you able to see any blood coming out of the deer immediately after the shot? If so, how much was coming out? If blood is pumping out of the deer, there will be a blood trail to follow. This is great news, but don’t think that this means you should get down and start looking for your deer right away. You still need to follow the rest of these steps.
Step 4. Remember landmarks where the deer ran
When the deer runs away, pay attention to landmarks were the deer ran. If it runs past a big oak tree, I know that I can go to that oak and potentially find blood. I can usually recognize at least one landmark immediately after the shot, but having two or three is even better.
This step is often forgotten by hunters because we get caught up in the moment. We just end up watching the deer run away without thinking about looking for a landmark. Shooting a lot of deer and mentally preparing yourself on what to do during and after the shot will help you remember to look for these landmarks.
If you happen to film your hunts, you can benefit from rewatching everything we have discussed so far for steps 1 through 4.
Step 5. Stay quiet and listen for the deer to fall over
If you happen to be hunting in hilly topography or thick cover, it’s easy to lose sight of a deer running away. Try to stay calm and quiet for the next 1-5 minutes and just listen. Hopefully you will hear your deer crash and fall.
When a deer falls over it will typically kick around a little bit. This can make a lot of noise depending on the spot where it fell. For example, kicking around in crunchy leaves as opposed to soft grass will be much louder and easier to hear.
Even if you don’t hear the deer crash and kick around, listening after the shot can point you in the general direction that the deer traveled in after the shot. You might be able to hear it walk away. This will offer another clue when you start tracking the deer.
Step 6. Inspect ground zero
I like to enjoy the rest of my hunt and reduce the risk of potentially spooking my shot deer out of his bed. Therefore, I wait at least 30 minutes or more before I inspect the area where the deer was standing when it was shot. Once you are ready to inspect ground zero, look for first blood, hair, or guts. What does the blood look like and what’s the color of the hair? Did you find pieces of stomach or guts?
The color of the blood is a clue for how good the hit was. Bright and pink colored blood indicates a lung or heart hit. If you see bubbles in bright pink blood, it’s likely a lung hit. Dark blood is usually a liver hit or a muscle hit. Lastly, dark blood with gritty material in it means the deer was probably hit in the stomach.
If you find hair, its color will give you another clue how good the hit was. If there is white hair on the ground, your shot entered or exited a part of the body that has white hair. White hair usually means the deer was shot low on the body. If you can’t find any white hair and all you see is brown hair, then that is a good sign you didn’t hit low.
If you find guts on the ground, then you should consider waiting 12+ hours for that deer to die. Wait 24 hours before you start tracking if you can wait that long.
Step 7. Find your arrow and inspect it
It’s common to find arrows at ground zero since they often pass completely through the deer. You could also find the arrow if your shot missed the deer or if it happened to bounce off the deer due to a lack of penetration.
Finding the arrow will help you determine the color of the blood and how good of a hit it was. I have shot deer in the vital organs that barely left a blood trail and I have also gut shot a deer that left no blood trail. If you find the arrow, you can confirm if you hit the deer or not and how good the hit is. That’s why is so important find your arrow. You might be wondering how far an arrow will go after passing through a deer.
If an arrow passes through a deer, it will likely be within 30 yards from where the deer was standing when it was shot. The speed of the arrow, its kinetic energy, shot placement on the deer, and angle of the shot are all influences of how far the arrow will travel after passing through a deer. If a deer is shot from an elevated position like a treestand, the arrow will likely be a close distance to where the deer was standing. On the flip side, if a hunter shoots a deer from the ground on flat topography, the arrow is more likely to travel a further distance beyond the deer.
Sometimes you don’t always know if the arrow passed through a deer. This is why I suggest buying lighted nocks for your arrows. Lighted nocks will let you know if the arrow completely passed through the deer. They also make finding your arrow much easier and help you to easily see where you hit the deer.

If your arrow gets stuck inside the deer then it’s possible for your arrow to guide you directly to the dead deer if there is lighted nock on the arrow. Lastly, arrows are expensive. If lighted nocks help you find a few arrows when you otherwise wouldn’t have, they will end up paying for themselves in the long run.
Step 8. Wait, Wait, Wait!
It can be very tempting to start tracking your deer right away. However, you should wait as long as you can if your goal is to find that deer.
In the real world, there are many reasons why we would want to start tracking earlier than we should. For example, you might worry about warm weather spoiling the meat or coyotes finding the deer. Perhaps you can’t wait to start tracking because you need start traveling back home as soon as possible.
If you have a legitimate reason for wanting to track early, but you believe you made a bad shot on a deer, then tracking early is not recommended. If the deer isn’t dead yet and you spook it while tracking, your odds of finding that deer are not good. Try to make plans to give that deer the time it needs to die. So, how long should you wait before tracking a deer after shooting it?
Give a deer 5+ hours if you hit it in the lungs or liver and give it 12+ hours if you hit it in the gut. A deer can live longer than 24+ hours if you don’t hit it in the vital organs. Therefore, wait 24 hours on poorly hit deer if you didn’t see it fall over and die and if other circumstances like weather are favorable. If you saw the deer die you can put your hands on it right away without tracking.
This might seem like a lot of time to wait, but you should follow this recommendation if you don’t have a good reason to start tracking early. I can’t tell you how many times I’ve heard someone say they shot the deer through both lungs, or in the heart, and they ended up not finding the deer because they spooked it while tracking. If you spook a deer out of its bed after it’s been shot, there is a good chance you won’t find that deer. Just wait.
There may come a time when you will have to decide what’s more important to you, saving the meat or finding the deer. If temperatures are over 40 degrees Fahrenheit, the meat will start going bad after about 4 hours. If finding a trophy buck is more important than saving the meat, then you should wait the recommended time that I mentioned above.
If you have a hard time waiting and giving your deer enough time to die, try to distract yourself. I will keep hunting and try to kill another deer if I have another tag to fill. I will go eat breakfast, lunch, or dinner. I will call my buddies to tell them about my hunt and ask them if they want to help track it. I will run errands. I will change out of my good camo clothing and put my blood tracking clothes on. Do whatever you can to waste time and give the deer time to die. If it’s dead, it’s not going anywhere.
Step 9. Decide when to start tracking
At this point in my tracking process, I usually have a pretty good idea where I hit the deer and how long I should wait before starting to track it. I will decide how long to wait before I start tracking based on everything we have discussed so far in this article.
This is the most critical step in the tracking process because it can be the difference between you finding your deer or not. I already mentioned that marginally hit deer can live for 24+ hours. If you spook them before they die, you could end up pushing that deer and making it nearly impossible for you to find.
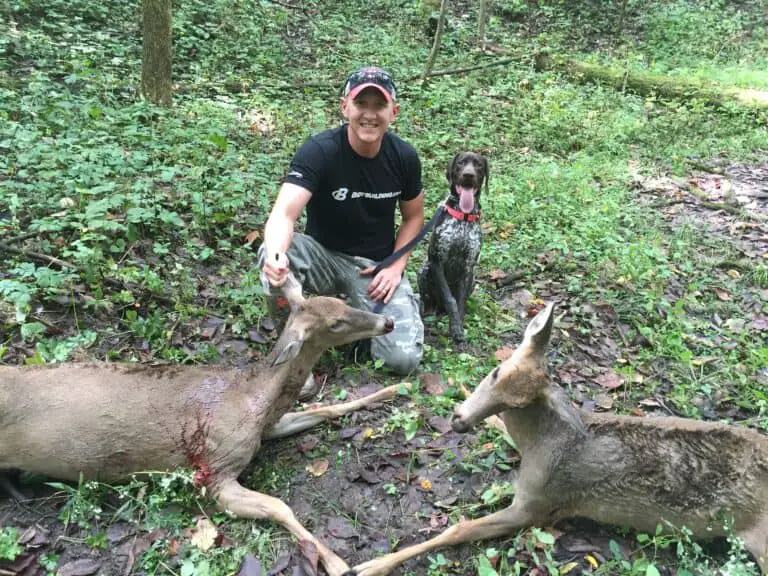
This step is also when you should consider if you will potentially call in a blood tracking dog to find your deer. If blood tracking dogs are legal in your area and you are considering using one, I suggest calling the dog tracker at this point. Discuss your next steps with tracker and ask for their advice on how to proceed.
If you start tracking a deer before a tracking dog gets the chance, you might end up throwing that dog off the scent trail later on. If you decide to track your deer before a dog, make sure you stay off to the side of the blood trail. Try not to cross over the trail or get any blood on your boots that could potentially throw a dog off the scent.

Step 10. Follow the blood trail and mark it along the way
When I start tracking a deer, I pull out my phone and turn on the tracking feature on the onX Hunting App. This app will trace my steps and I can use that information to get an idea where the deer might be traveling to. Also, it’s helpful to see where I’ve been if I end up grid searching for the deer. Another way to track your steps is by marking your trail with toilet paper. Just tear off a square of toilet paper and stick is on a branch or anything else so it doesn’t blow away.
Make sure you carry your weapon with you anytime you track a deer. You discover that your deer is still alive and you might get an opportunity to shoot it again. This isn’t likely to happen but it does happen often enough to justify bringing your weapon with you.
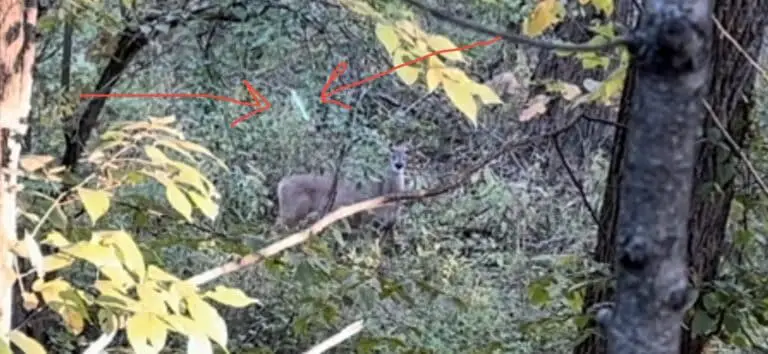
This brings me to my next point. Track slowly and keep your eyes up. If your deer isn’t dead yet, you might be able to spot it before potentially spooking it away. If you spot it without spooking it, you can either make a decision to sneak away and give it more time to die or try to sneak up and shoot it again.
When you’re looking for blood, make sure you don’t just focus on the ground. It’s easy to get focused looking at the ground and ignore the vegetation that’s a few feet tall. Deer will often walk through taller vegetation, rubbing their bloody body against the plants. You can also find blood on tree trunks and anything else that’s less than three feet from the ground.
Learn what you can about the blood itself. Are you able to confirm if it’s heart or lung blood? Is there blood on both sides of the trail, indicating that the deer is bleeding on both sides of its body? Is the blood trail getting harder to follow? Give yourself time to analyze the blood trail to see what you can learn.
During the track, you might find clues that suggest backing out and giving the deer more time to die before continuing to track it. For example, if you find a spot where the deer laid down and left a pool of blood, you might have spooked that deer out of that bed without realizing it. This might indicate that you should give the deer more time to die. Read the clues that are given to you and respond accordingly.
Step 11. Find the deer at the end of the blood trail
If you found the deer, congratulations! Make sure you take time to reflect on what you learned from tracking the deer so you can become a better hunter. What could you have done different to make the deer easier to find? Perhaps you need to make a better shot, change the type of broadheads you are shooting, or lower the height of your treestand to get a better shot angle on the deer. Is there anything else you will do differently next time?
If you didn’t find your deer, don’t give up searching for it yet. There are several ways for you to still find it. Keep reading along.
Where you can find a wounded deer with no blood trail
Dead dear are commonly found in thick cover, bedding areas, or near water. Make sure you search these areas if you don’t have a blood trail to track a deer. Walk along ditches, creeks, rivers, etc. Don’t forget to use your nose because you might be able to smell a dead deer before you see it.
When to give up on a blood trail
There are a lot of reasons to give up on a blood trail. It can be frustrating when you can’t find a deer right away. However, sometimes it takes a little extra effort to find it. How far are you willing to go to find your deer?
Did you complete a grid search? I always perform a grid search if I think the animal is fatally wounded. However, you might have enough clues to come to conclude that the deer is not fatally wounded. This might be a good reason to give up on the blood trail right away.
Did you call in dog tracker? If you tried to find your deer with the help of a blood tracking dog and you still can’t find it, you might consider calling it quits at this point.
Did you think your deer possibly died on a neighboring property? Did you ask for permission to search that neighboring property? If you can’t gain permission to look for your deer then it might be time to quit looking for your deer or ask that landowner if they will look for you.
Do you have access to a thermal scope? Thermal scopes can make finding deer much easier and faster. However, these scopes can be very expense. If you have access to a thermal scope, use it to look for your deer at the beginning of the tracking process. It’s possible that you could spot your deer before you even start looking for first blood.
Do you have access to a drone? You could fly a drone to cover a lot of ground and search for your deer from a bird’s eye view. This method of drone searching for a dead deer can be very useful around tall grassy fields.
Did you wait 24+ hours for the deer to die? Did you see any buzzards flying around? Buzzards could lead you to your dead deer if it’s been dead for a little while. If you exhausted all of these options to find your deer after it’s had plenty of time to die, it’s time to give up the search for your deer.
Conclusion
As you can see from the length of this article, there is a lot to consider when tracking a deer. Learn to recognize all of the clues available to you and make good decisions to increase your odds of finding deer. There is something to be learned from every tracking experience. Make sure to reflect on your hunt, your performance, and your areas for improvement to help increase your odds of finding a deer at the end of a blood trail.